Many districts offer families an opportunity to opt-in to buy device insurance for their students device for the year. But how do you manage that best?
Manor ISD came up with a wonderful workflow solution to utilize the Premium Policy Manager App to do just that!
USING POLICY MANAGER WILL:
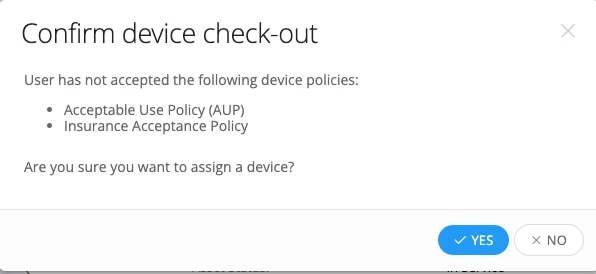
- Generate a waring if a device is checked out or assigned to a student who didn’t accept insurance (warning will not display with spare pool devices assigned within a ticket).
- Create a public URL to be placed on a website or social media page for parents to click on to accept the device insurance
- Add a record to the students user profile indicating whether the device insurance was accepted or denied
- Provide a filterable field to be used in
- Custom views to generate a list of those that accepted or denied the device insurance. This can then be utilized with bulk actions to select all students who’s parents accepted and charge a fee, and generate a statement for the parents to pay.
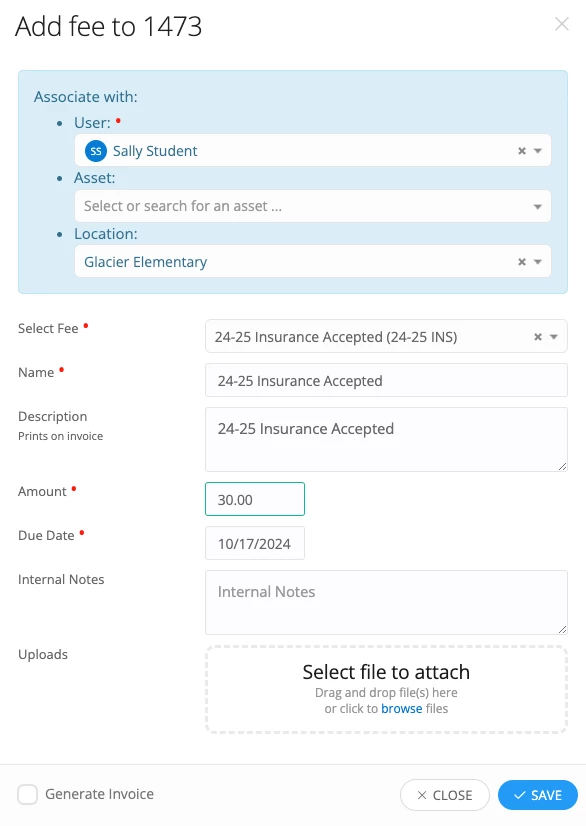
- Rules that can generate a ticket for each insurance acceptance for your agents where they can charge a fee there within the ticket, and keep the ticket open until payment has been made.
LET’S SET IT UP!
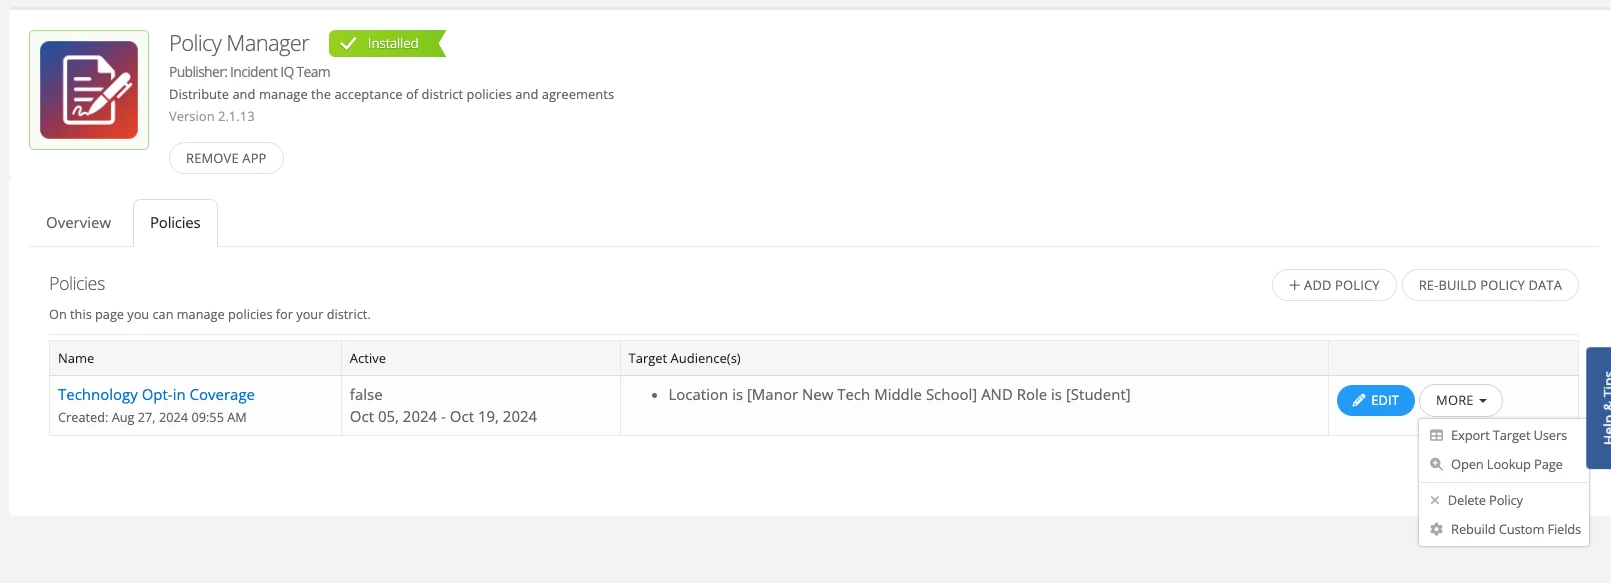
- Go to Apps/Manage and Installed Apps and find the Policy Manager app.
- Click Manage and then click on the Policies Tab you can click the +Add Policy button to create a new policy.
- Provide a name and choose a policy type as well as the active period for the policy. It is suggested to use the school year as the active date range.
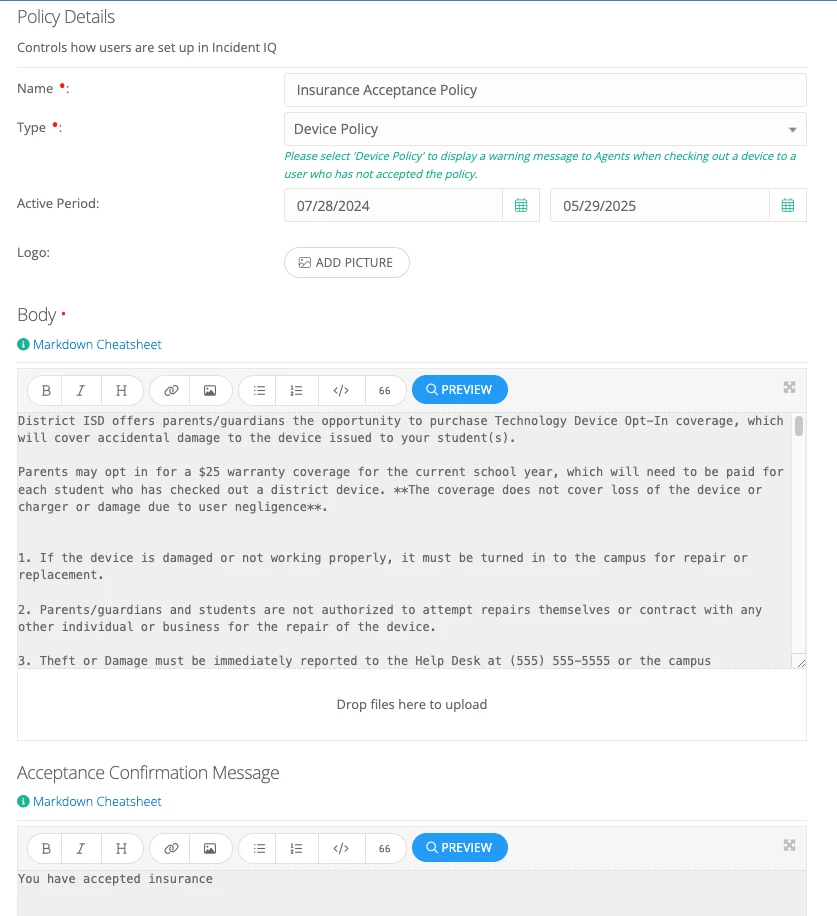
IMPORTANT: If you choose a shorter active period window, an unaccepted policy will not show in the user profile any longer with a status of Not Reviewed, and will also not trigger the notification that the student has not accepted the policy when an asset is checked out to them. Best suggestion would be to allow the policy to be active for the school year, but you may choose to deny the acceptance for those that submit the policy after a specific due date
- Complete the Body, Acceptance Confirmation Message and Decline Confirmation Message. Click the Preview button to see how others will view the policy. Also don’t forget! You can use HTML here, so be creative as shown in the preview example below.

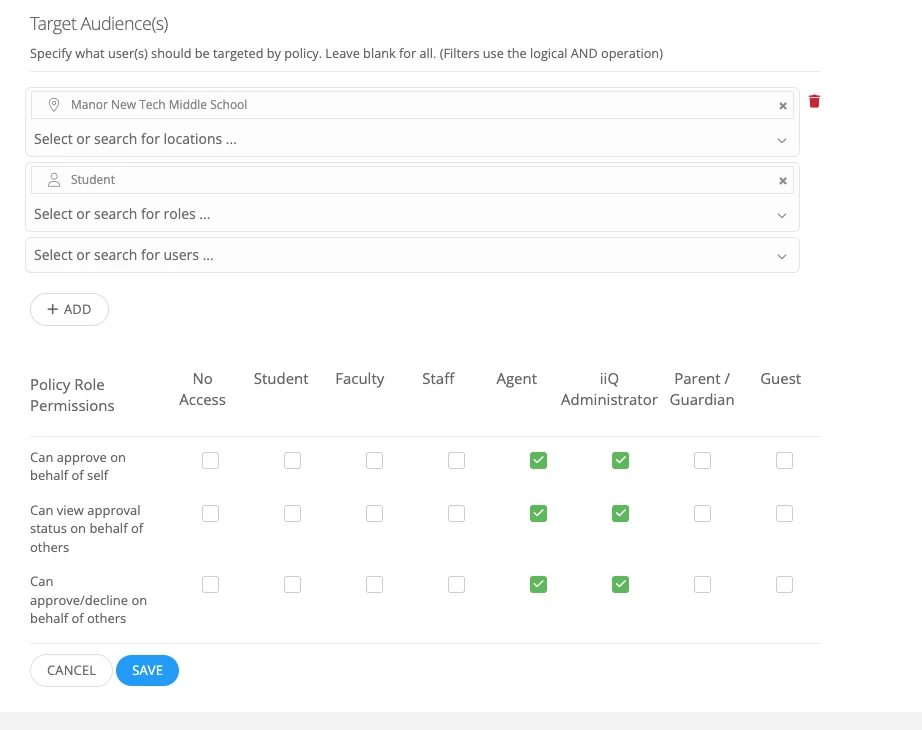
- Set the rest of your Options, Email Options and Target Audiences.
- Acceptance Methods (for the student device insurance it is suggested to use Direct URL or Lookup by Student ID)
- Target Audience (must have a location, role or user chosen or it will apply to all).
- Save your Policy and go back to the initial Policy Manager app screen click and click on the Policies tab
- Here you will click the MORE drop down and choose Open Lookup Page
- The Student ID screen will appear. This is what your parents will see when they click on the link you provide. They can type in the student ID and proceed to complete the required fields to accept the policy.

- Copy and paste this URL from here. This will be the URL to add to a school website for parents to access. It is recommended to put this on a school website as opposed to an email blast if you are hoping to only have the device insurance policy viewable/accessible for a short period of time.
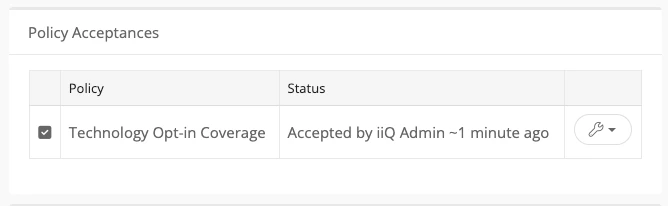
- Once a policy is accepted you will see that appear in the students user profile under Policy Acceptances.
DEVICE INSURANCE POLICIES HAVE BEEN ACCEPTED-BUT NOW WHAT?
- Create a Users custom view filtered on the policy being accepted and using bulk actions you can set the policy approval state in bulk if you wish to remove or add.
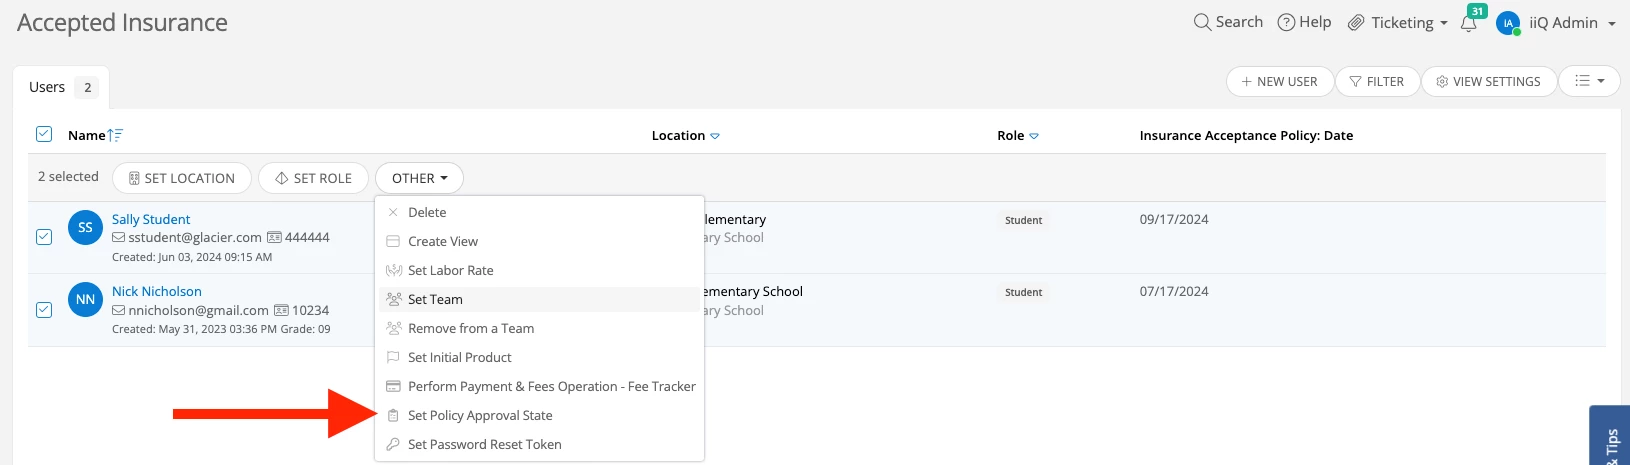
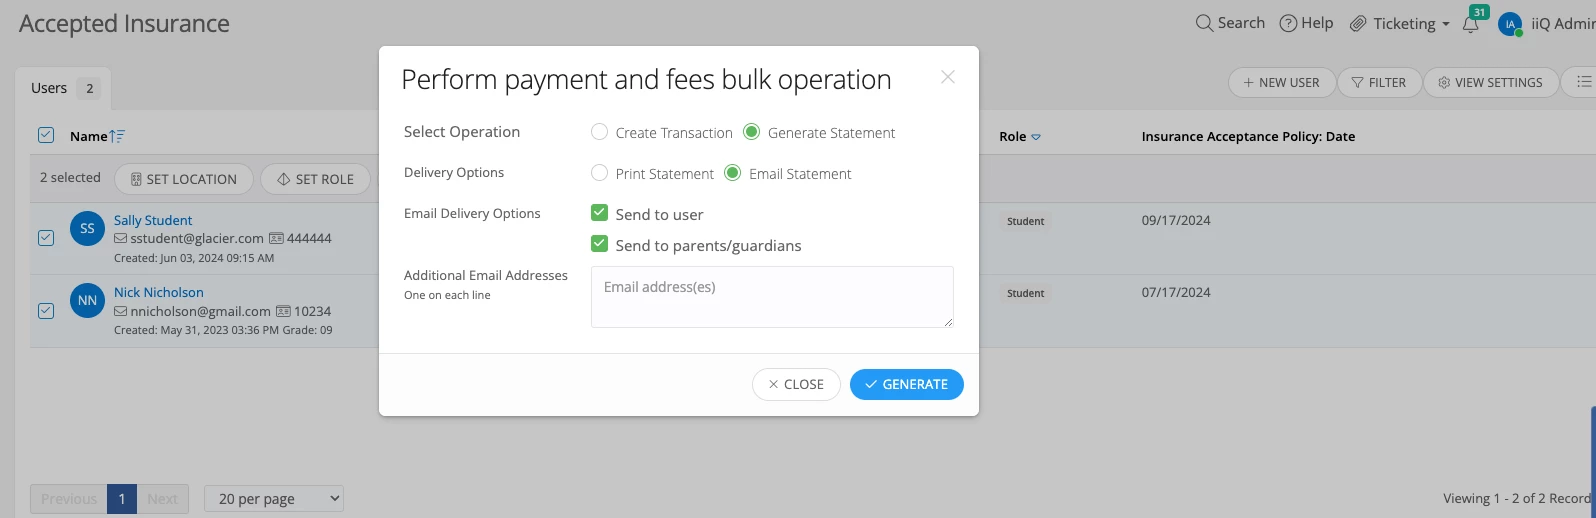
- You can also perform payment operations and fees operations here for the payment app you are using-which will can allow you to generate a statement to the parents/guardians here
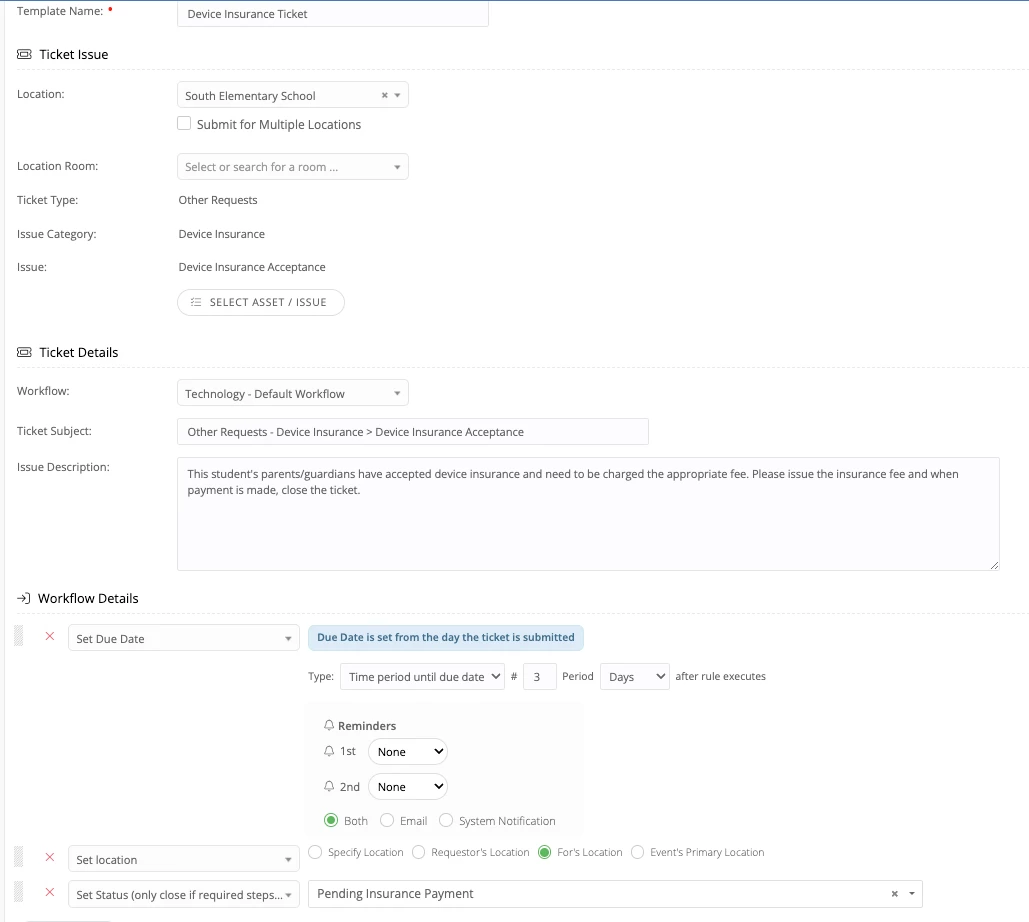
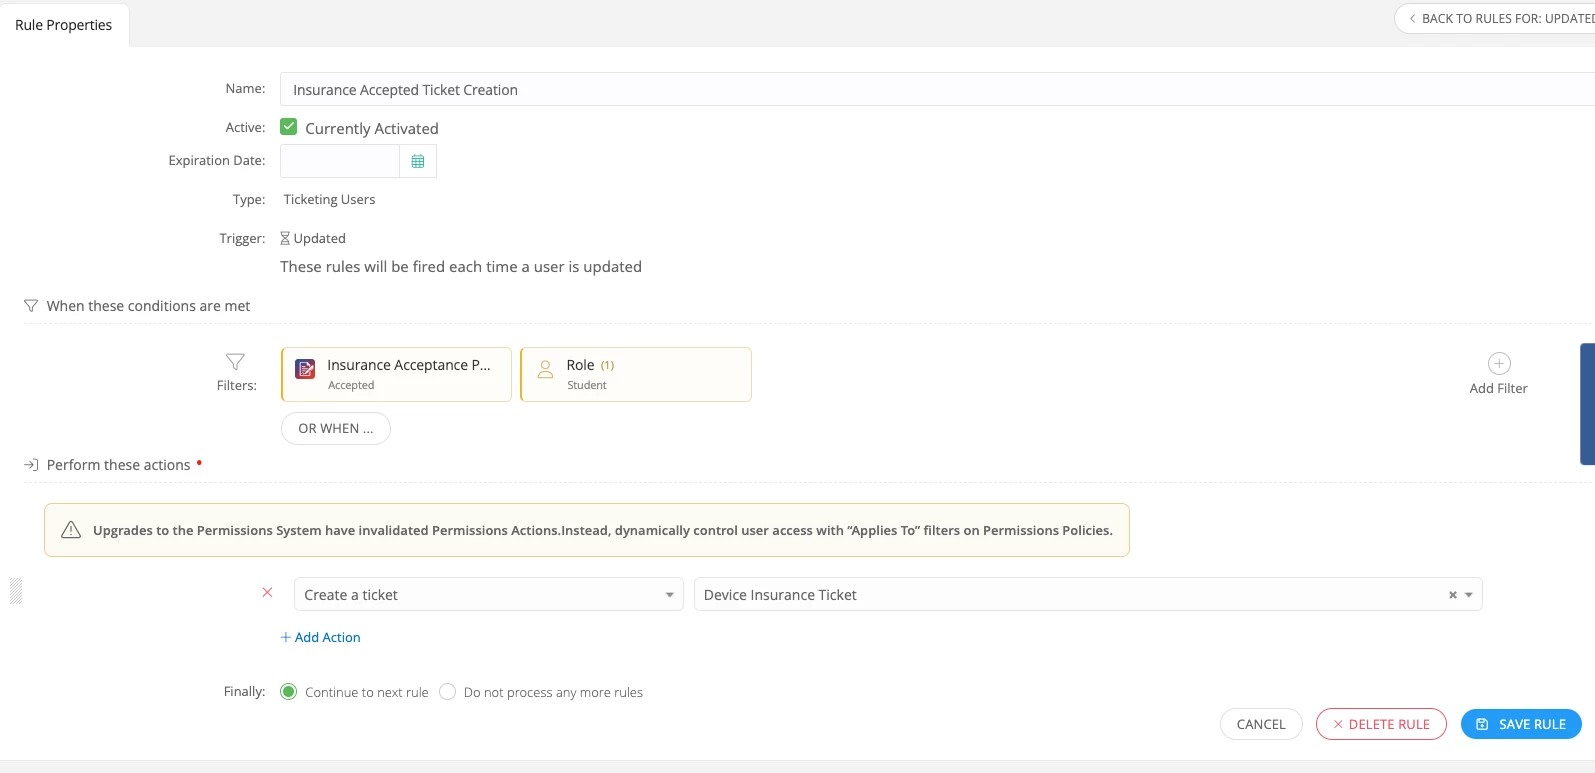
- If you wish to have tickets generated instead of doing bulk actions for charging the insurance fee, you can do this with a combination of a new Issue Category and Issue Type, a Ticket Template, a new Ticket Status and a Users->When Updated Rule
Go to Admin/Issues/Other Requests and add a new Issue Category and Issue Type such as Device Insurance. You can set the visibility so your internal users won’t see it when submitting a ticket, and don’t forget to add a resolution action.

Create a new ticket status and consider an On Hold workflow to not trigger your SLA’s.

When creating your Ticket Template utilize actions such as Set Due Date or Set Location.
For your users rule be sure to filter on the policy accepted and the role of student to help iiQ rules engine find exactly what you are looking for to trigger the action to create the ticket.
- Within the ticket your agent can add the fee and generate the statement the same way that you would do with bulk actions, but now there is a ticket trail for this fee. This fee will be attached to the user so you can still utilize that custom view to generate reminder statements if payment is not made. Once a payment is made, the agent can add the payment here in the ticket and then close the ticket.